1/350 USS Saipan LHA-2 (Gallery)
|
by Keith Bender |
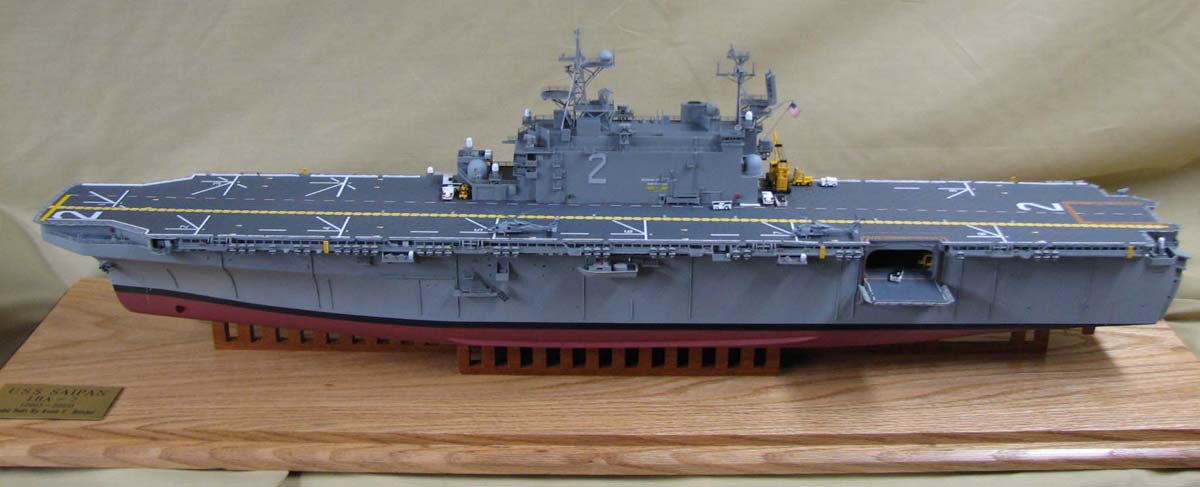
1/350 USS Saipan LHA-2 (Gallery)
This project started with a returning client who was an officer aboard Saipan. I jumped on the offer without a thought of how will I do it. After looking over the sizes of both the LHAs and LHDs I figured I could use the 1:350 Gallery Wasp kit. I already built the Wasp and knew it was just a mater of a lot of cutting and rebuilding using a fresh kit to start.
LHAs are 106.6 ft.
at the beam and LHDs are 105 ft. I left the beam alone for just 1.6
scale ft. However the length was different along with the overall
look of both ends. At first glance of both classes of ships you may
think they're very similar, kind of long and boxy with a large island.
That is about all they have in common other then they sink partially on
purpose. Sort of like looking at an original VW bug as compared to
the new VW bug. They look alike but that's about it.
I found the most difficult thing to do was
hacking into a brand new Wasp hull, it killed me to do that because it
really is a beautiful kit. The LHAs do not have a bulbous bow
but more a knife edge that is rounded down at the forefoot and there is
a bow thruster as well. I had to fill in the area where the two piece
bulb would have been added if it were to be Wasp Sanding and smooth it
out here. Fortunately the plastic in this area was modeled very thick
so I didn't break through into the hull when shaping. The area around
bow at the flight was a tough job due to the five inch gun mounts.
There is many bulkhead to build and have the correct angle. Again with
the kits plastic in this area being so thick it saved me some problems
but did require much filing and sanding.
The stern gate area was just as much of a thrill to start as the bow. It is entirely different then a LHD and here is where I removed 24 feet of the hull from the Wasp to make the Saipan. Fortunately my client didn't want the well deck open or that would have been a whole other can of worms to open for they have two completely different well decks per class. BTW I used plans from the Floating Drydock and the National Archives along with some from books and photos from many. Photoetch from the Wasp kit provided most of it for me but i did use some Gold Medal as well.
The hanger wasn't too difficult but it did have it's moments. I could use the deck from the kit and most of the bulkheads but they all needed some mods. The flightdeck was laid out with great care. The fwd. five gun and elevator area had to be done without mistake. The aft elevator was a challenge due to lining it up with the pit, stern gate and flightdeck. Sounds easy but it provided some gray hairs.
Next big thing was relocating the elevators. Wasp has two, one on each side where as Saipan has one on port and the other aft center. Both have a kind of concaved area around them so my idea was to remove the entire area from the stb side and fill it in with a blank piece of plastic. The port side was removed and place further aft. This went rather well due to the hull being flat in both areas.
The island was entirely scratchbuilt for there is nothing alike in either class of ship. I did use some of the radars and the Wasp windows were used along with some other small parts. Both fore and main mast are made of brass rods and soldered. Once all the major construction was finished I moved on to the painting. Bottom red is colourcoats and everything else is Testors Model Master. You may notice the yellow flightdeck line is offset and not running parallel to center. When built this line was parallel but later moved off to an angle, so it is not your eyes nor bad workmenship this time. As per instruction I was to only put two birds on deck, she is rather bare but that was my orders. The decals from the kit were used and that required a lot of kitbashing to make the yellow and red safety lines around the elevators, I had just barely enough. I also used a set from The Resin Shipyard.
You can see the differences in the two classes in
the photos which i am glad i could do just to compare the two. There
is much to talk about in this conversion so if you have any question please
feel free top ask me. I did enjoy this very job very much, I love a challenge.
