by Ron Smith
1/350 USS Langley CV-1 (ISW)
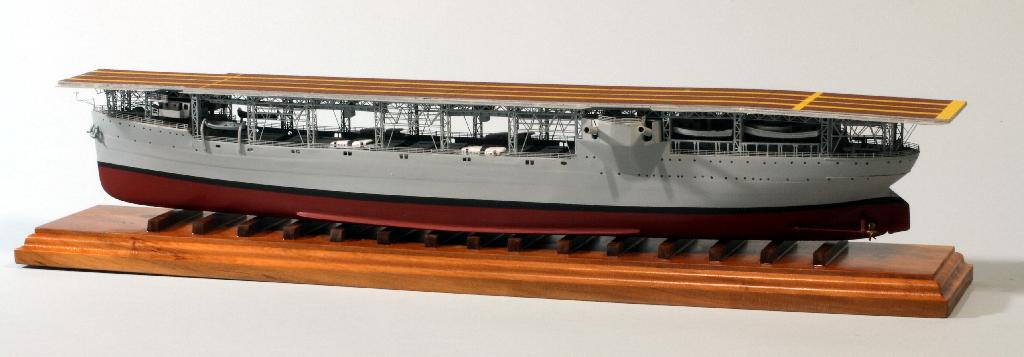
I originally bought this kit to build for a fellow that had been Langley's photographers mate from 1936 through March 1942 when they made him a Marine combat cameraman. Unfortunately he passed away before I finished the build and I never got to give it to him. This is one of the later Langley's by ISW and came with a Nautilus wood deck, given the truss work underneath I laminated the deck to .032" thick aluminum so it would stay stable and provide a solid gluing surface for the trusses. The kit did not have bilge keels so I got a copy of those on Jupiter (the collier that was converted to Langley) from NARA's microfilm section. Typical of every ISW kit Ive seen, the bottom of the hull was a minefield of bubbles and required a large amount of putty. The rudder skeg was pretty much resin foam inside a skin or resin so I carefully hogged out the inside and filled it with thick CA. The small parts were better than in other ISW kits I had but still no great shakes, lots of styrene rod CA'ed into bubble pits and lots of little dabs of putty.
The PE is pretty good and the truss directions mostly work. Places to watch out are the aft most set of trusses and foremost set of trusses. You need to alter the fore and aft braces between the aft most truss and the truss just forward of it, it's designed for straight fore & aft orientation but in reality it's on an angle. The foremost truss on my kit sits 1/16" too far forward, I don't know if that's because the hull shrank that much (resin does shrink unpredictably as it cures) or the truss work is designed 1/16" too long. I started with the elevator trusses and worked backwards, locate the trusses and cross braces that surround the elevator and glue them to the underside of the deck.....from there work one set of braces and one truss at a time and dryfit before gluing to the underside of the deck. Be aware in some places as you get to the raised stern and forecastle, you may have to trim a little off the bottom of the trusses.
The deck finish is dark cherry alcohol based wood dye, two light coats
of shellac, a misting of MM Acryl mahogany deck stain with a drybrushing
of several shades of artists' acrylic. Using the dark cherry dye first
and being careful *not* to flood the recessed lines with paint eliminated
the need to apply a wash to "pop" the detail.
