by Fred Branyan
1/350 IJN Makigumo (Pitroad)
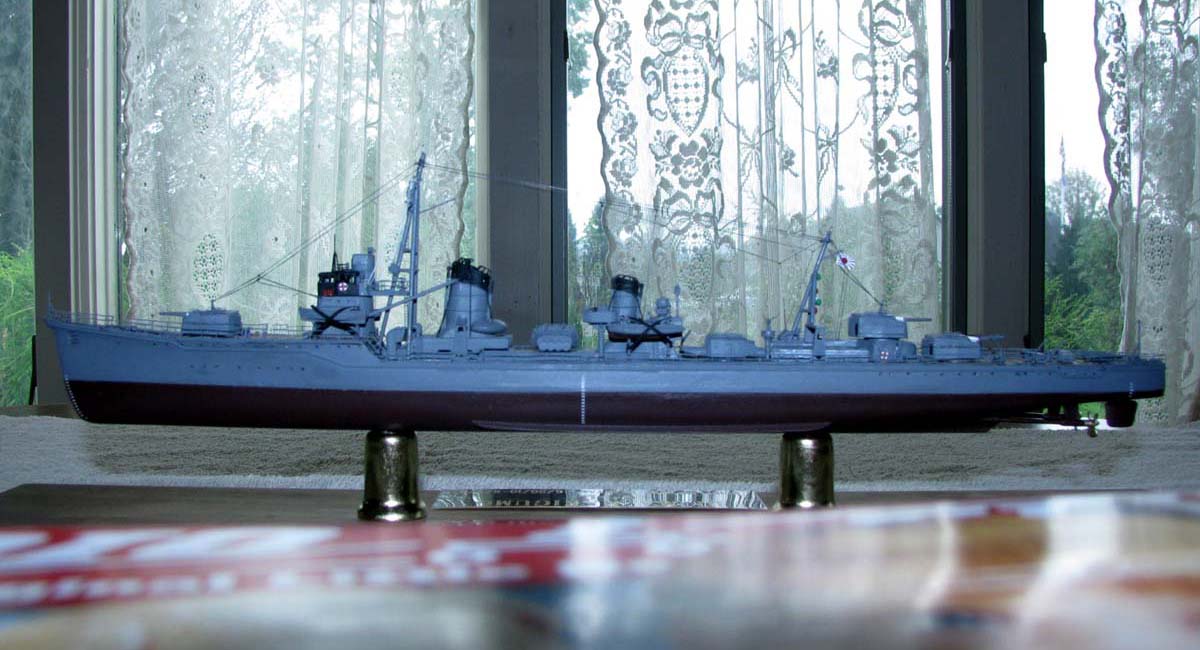
This is the 1/350 Pitroad Yugumo model built to represent the Makigumo.
Before discussing the model I would like to thank 2 members of this site, Dan Kaplan and Martin Quinn. Dan provided crucial detail information on IJN ships in general and this one in particular. The photos and information he sent were extremely valuable. Martin also shared IJN info he had, plus he made massive contributions to my How to Build Ship Models for Idiots binder. Both answered numerous questions and were very patient and generous in their help. I would also like to thank my good friend Professor Michael Nazarro for providing the engineering equipment, tools and expertise to mount the hull to the base on this and the Mustin model.
The reason I built this model was mainly as a training exercise for me. It is the first all plastic ship model I have ever built. My father was on the Hornet CV8, sunk by this ship and Akigumo. I could not find any photos of Akigumo, so I decided to build this one.
I tried to match the model to the photo of the ship at http://en.wikipedia.org/wiki/Japanese_destroyer_Makigumo_(1942), which also has its brief history.
I decided to believe the photos apparent portrayal of black paint on the overhead of the bridge and black tie down straps on the boats. These features do not appear on any other Yugumo class photos that I could find. This ship may have been unique in that regard. It could be camera issues that created the black appearance, if so my error.
A few comments on the kit. All of the part trees have Kagero on them. The inaccuracies of the kit have been dealt with on other parts of this site. Two major issues I had with the kit were the very bad fit of the upper and lower hulls, and the bad fit of the aft deck house to the deck. The number 2 turret when first dry fitted was starboard of centerline, I had to widen the hole to get it centered. May I suggest that any builder of this kit dry fit all major components before painting them. Despite multiple attempts I could never get the port side of the bridge structure to glue flush to the deck. It fit OK on a dry fit before I glued it, but for reasons unknown would never seat properly to the deck on that side. This is probably not a kit issue but poor technique on my part or poor glue, although the same glue worked fine everywhere else on the ship. The instructions have you drilling more holes on the deck than there are parts for, so be sure to match an actual part to any hole on the deck before you drill it. You can see on the overhead deck close-ups where I had to fill holes, plus one I forgot just forward of the bridge.
Speaking of paint I used the following Tamiya acrylic colors: Kure Grey, Linoleum Deck Brown (lightened with flat white to try to match the color chart that came with the kit), Hull Red, NATO Brown for the boat interiors (again trying to match the colors on the detail kit below), Flat White and Flat Black. Once the deck was glued to the hull I sprayed the hull and deck with an approximate 70/30 mix of clear flat/clear gloss to try to give it a metal appearance. I used gold pencil to try to simulate the cables on the fore and aft decks, the gold is faintly visible in the bow/stern overhead photos. The masts were scratch built with 3/64 brass rod. The lights on the aft mast are adhesive gems. Unfortunately I could only find red ones in the size needed, and had to paint white and green ones. I suspect they are a little larger than scale. I used EZ LINE for rigging between masts and UNI Caenis for the vertical lines on the foremast. UNI Caenis is barely visible and I painted it white. I would suggest it is too thin for 1/350, probably just right for 1/700. Neither product in my experience would permit portraying any sag without curling, however both worked well provided you want to show taunt lines My daughter has donated some of her hair for that purpose and I might try that on the next model, which will have lines of both types.
If anyone has a method for producing neat red and white life rings please let me know. I tried thin masking tape and a few other wild ideas, none of them worked.
The following detail sets were used:
The kit 5 gun turrets and torpedo mounts were pretty detailed, the 25mm were not. The boats were poor.
The kit contained very little PE, for the stack caps only. The lack of railings in particular is a major issue.
Overall, unless the builder is willing to invest in a lot of detail kits, I would not recommend this kit. Anyone who wants to build a full hull model, if mine was typical, is in for a major seam sealing campaign once the 2 sections are glued. The kit was a challenge to build, and accomplished the intended mission of giving me experience in building this type of model. Due to the quality of this kit and the problems I had with it I will not get another Pit Road kit. Hopefully another manufacturer will produce a better true Yugumo class model.
Thanks to Dan I have a lot of photos, rigging diagrams etc. on the Kagero and Yugumo classes. I will be happy to share the material with anyone who needs it.
On to the next project, a 1/350 model of the USS Barton DD-599, from the Dragon Laffey kit, , the ship which picked up my father after the Hornet was sunk. If by some miracle someone out there has a port side photo of this ship or its sisters, DD 598 and DD 600, please let me know. Once that is complete the next ship will be another one that was at Santa Cruz, as yet undecided.
