1/380 SS Hawaiian Pilot (Revell)
|
by Keith Bender |
1/380 SS Hawaiian Pilot (Revell)
Here's a blast from the past, good old Revell Hawaiian Pilot in box scale 1:380, the date 1955 is still printed in the inside of the hull. The kit was first issued as USS Burleigh then Revell put it out as Hawaiian Pilot and in fact that is the history of the real vessel. Burleigh was built for the navy during WWll and when the war ended the Matson Line purchased it along with many of her sisters.It was a top contender in it's day and is still one on my favorite models. Guess that's because it brings back my childhood in some ways and in other ways i never left it. I was asked to build this in Jan 2018 and just completed her. Back when this kit was first produce , Revell did not make their ship hulls with a full bottom. Not really sure why but i have heard over the years several reasons but not to be discussed right now. I decided to make it a full hull because frankly that is how i like my ship models.
I used a 1/2 thick piece of basewood, glued it on then carved it to shape, period. The rudder on the C-3 class was a split type which was done to neutralize the tork from the propeller. I dug up the prop from my parts box, made sure it was the correct size and made the rudder from plastic sheet. That was about the only scratchbuilding i had to do in this build.I found the most annoying part of building these old kits if you are going to use PE railings is removing the molded on railings. They are everywhere and the job gets old fast. The superstructure on the model is no picnic either. Beside all the railings we also have to place the vertical deck support post in their places. Oh, one other thing Revell did that makes building this kit more difficult is back in the day their tool makers decided and for what reason i don't know, but they tooled the molds to have the superstructure decks and bulkheads combine. In other words all the decks have both bulkheads from the deck above and below model as one and all bulkheads are split at the portholes. Pretty much the decks are sandwiched in between. Which makes filling all the seams more difficult . You have to reach in there to sand them, paint them and add the PE and the poles. Which do you prefer to do first, paint the decks or paint the bulkheads. Either way it is a pain. Another hair pulling thing is the tool makers used an end mill that had a very slight radius which does not leave a sharp line where bulkhead meet decks. Painting this is nerve racking and a steady hand is required, the paint either wants to roll up or down on the decks.
The rest of the build was pretty straight forward. The PE was from Gold Medal Models, it is the navy ship 1:400 set. Rigging was a bit of work and you must decided what way you want to go. I went with a standard running rigging which means you have all the general lines there but not all the working rigging as if the model was built as a diorama in working status. I had to make 130 very small brass eyes to attach the lines to. These were done by bending .006 wire around the end of a tweezers then soldering it so the eye won't pull open when the rigging is pulled taunt.
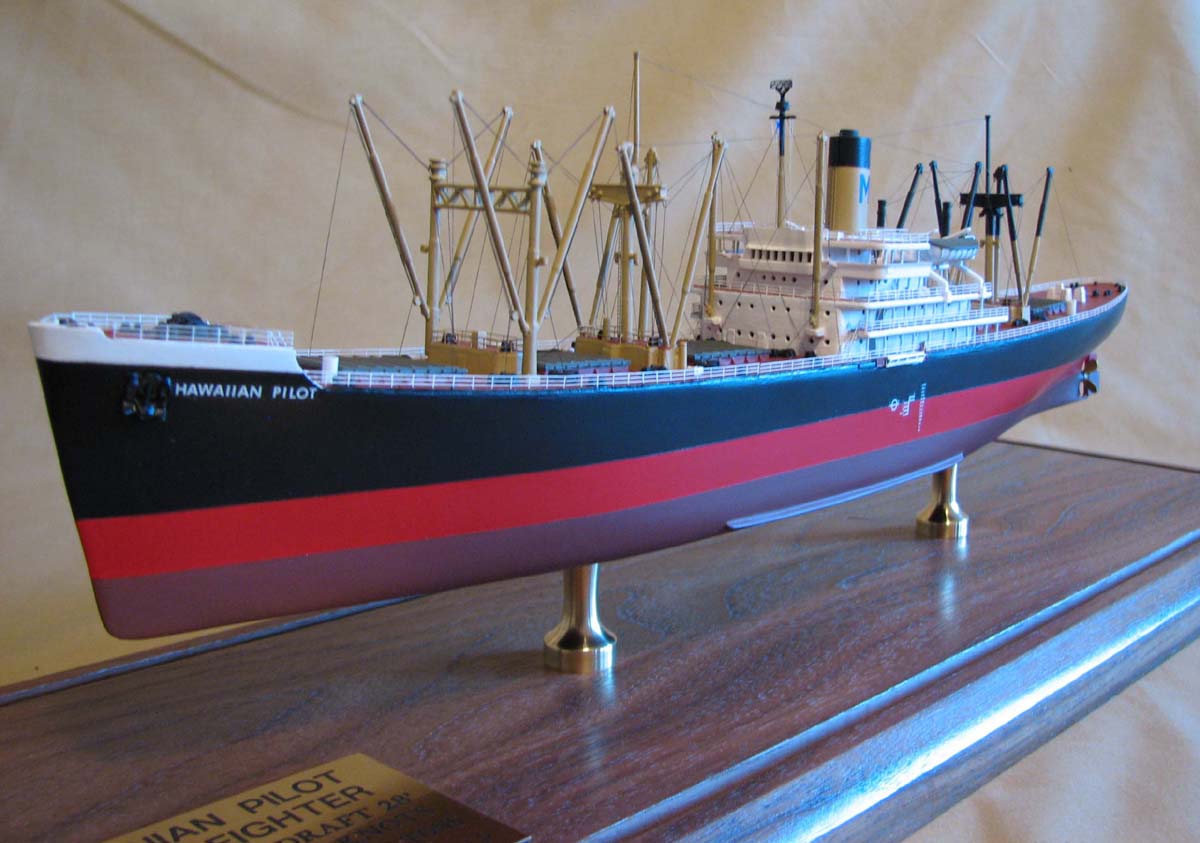
The paint is a mixed bag as usual in my building. Note: Matson Lines back in the day used a red color on the decks but later went to gray. I choose to do this model as early post war with the red decks. That color is Floquil Oxide Red. The lower hull is Colourcoats Modern Anti fouling Red. The upper red is Testors from the little 1/4oz bottle. The "spar" color used on all the booms and stack is USCG Spar. I knew the coasties would like that rather then "buff".
In all this still is a good fun kit to build if your going to deck her out in all her glory or just do it right out of the box as i did as an eight year old in 1969. Still have it and she is my oldest surviving model and still all intact which is amazing with those booms and how many places I live in the past 49 years.
